Tuesday, November 27, 2012

another $1.99 find

If you have read even half of one post on this blog, you are very well aware that I love 2 retail stores more than the normal person...The Goodwill Store & Home Depot. Shocking...right?
I think that one of the reasons I love these two is because, more times than not, they go hand in hand. I find a beat up dresser or a table that needs a little TLC at Goodwill and then head straight on over to the Depot to pick up any materials I may need to fix 'em up. 

Well this time around- Goodwill stood alone. For $1.99, I picked up this cute little thing...and all I had to do to "fix it" was wipe it down with a damp cloth to remove the dust.
Two things I want to say about this photo...1) stop making fun of my hair it was early in the morning , give me a break will ya 2) please notice how crooked my camera is...this is why you have to tilt your head to make all of the photos on this blog look straight- photography isn't exactly a strength of mine.

 Even though I already posted it, I figured that it wouldn't be a bad idea to blog about my trick on how to hang things straight the first time around ...I use this method all the time and it has never failed me.

1) use a piece of painters tape to mark the distance between the screw holes on whatever you are hanging
Each of the small stickers above say $1.99...I think the person who tagged this thing was making fun of my internal dialogue ("$1.99?!?! Woo Hoo!, seriously? how could this be $1.99?!?!? Woo Hoo! For $1.99, I'll take it! Woo Hoo!!") 

2) Remove the tape and place it on your wall at the height you want to hang whatever it is you are hanging. Use your level to make sure it is...yep, you guessed it...level.

This piece of tape really is straight...I just struggle with making the camera straight.

3) Drill your screws into the wall at the very top or very bottom corners of the tape

4) Remove the tape and hang whatever it is you are hanging.


Saturday, November 17, 2012

wedding obsessed

I have a bit of an obsession with weddings....

All girls do, right?  (please note that this post has a footnote)

The thing is that my obsession is a bit different. 
Sure, I daydream about what my big day will be like, and that day will come with due time, but I am also obsessed with weddings that aren't my own.

I am obsessed with the idea of crafting an event that is practical but pretty. thrifty yet undecidedly elegant. Dinner parties are fun to throw, and with a few creative touches can be quite special, but a wedding has the potential to be a completely unique event...one that tells the story of a couple and their personalities...the fun of planning a wedding is that the possibilities are endless. 

I got my first (and admittedly only) taste of planning a wedding this past year. I was my sister and new brother in-law's unofficial wedding planner, and loved every second of it. I wanted to post about the DIY projects that I finished for them as soon as I launched this blog, but thought it would be better to wait for their pictures to arrive.

You all know I love my mood boards, so that is where I started. My sister wanted the day to feel summery, rustic, and casual. 
Lys and Dave had the amazing photographers Heather Colt and Krista Howard from Powerstation events capture their day. Here are some of the photos they took of the DIY decor I created for their ceremony and reception...

The Candy Table


Seating Chart

Signs


Center Pieces


Here comes the Bride!


 Water Bottle Labels

And for good measure...the fam


** this post is not intended to scare off any single, straight men who happen to read this blog ( I know that there are a few of you out there!) ...I am not that girl that talks about our wedding and white picket fences on the second date...I swear! **

Tuesday, November 6, 2012

"Wherever you are, be all there" -Jim Elliot

Last week I posted  about a trip I took to the Goodwill Store. I mentioned buying 3 pieces of furniture for $1.99 each... but then only wrote about one...what a nerve!

Well, here is number two...plus a little extra.

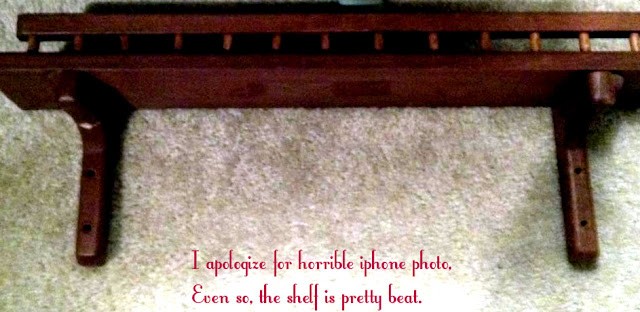
I found this little shelf in the back of the store. It's a beauty, don't ya think?


No?

Nah, I didn't either. What I did think is that with a little primer and paint this thing could be quite cute.

I debated on color and use for a bit. At first I wanted it to be painted grey and used as a perfume/jewelry holder in my bedroom. I realized though that the wall it would have to go on is way too big for this tiny shelf.

So, I moved on to Plan B: paint it and figure out where it will go later.

Here is the end result of Plan B:


As soon as I drilled this guy into the wall- I knew that I wanted to upgrade this wall even further. I love my new (old) tea station, but the wall needed a little more pizzazz. So, I went crazy...


This is now my favorite wall in my apartment. I re-used all of the frames except for the 3 teal ones, so it only cost me around $20 bucks (and a whole lot of measuring) to complete the entire thing.

I started by laying out the pattern of frames on my kitchen table (even though I didn't follow this pattern exactly, it gave me a good idea of what I was working with)


Everything on this wall says something about me... My family & friends, the beach, UConn, and my new favorite quote "wherever you are, be all there"- Jim Elliot

....I smile when I walk into my kitchen and see photos of everything/everyone I love all in one spot.


Thursday, November 1, 2012

mini makeover and mixing patterns

I performed a RAD yesterday..you know, a random act of decorating.  Don't ask me why because I won't be able to tell you, but I randomly got off my couch walked over to my linen closet pulled out some old pillow shams and a red blanket that I had stuffed away. Apparently I felt that it was time to change the color scheme in my bedroom. I know, I am weird.

My mini bedroom makeover was free and was just enough change for me to feel like I created a new, fresh space. Which version of my bedroom do you like better?


My quick switch of shams got me thinking about mixing patterns. Combining stripes and flowers and checks can be a bit unnerving....especially if you are the matchy matchy kind. But, bringing different patterns and pops of color into a room give it more personality and energy. Here are my very unofficial rules on how to mix patterns

1) Use a multi-color pattern as your "base". Pull colors from that pattern into the rest of your room. 

2) It isn't necessary for all of your patterns to be made up of all the same colors. As long as they share similar tones and shades (mix pale colors with pale colors and deep tones with deep tones) you can mix to your heart's content. 

3) Vary the scale of your patterns. You don't want your prints to be competing for attention. A large floral pattern looks best next to a smaller check or pinstripe. 

4) Combine different textures and use your color scheme to marry them. The layering effect of mixing textures and patterns livens up a room.  Mix linen with cotton and velvet with silk...go for it, you have nothing to lose. 

Happy Friday!
xoxo