Thursday, May 12, 2016

Apartment Tour: Bedroom Edition


Racy post title, eh :) oh, common... 

Having two bedrooms was a must for us (me) when we were on our apartment hunt. Given the fact that we moved further away from my family, I wanted to be sure that they had a place to stay when they came to visit. No hotel for them, family time...the whole time (we are sickeningly close).

Our apartment is two levels, with a bedroom on each floor. We opted to make the room on the main floor our master. While I love the room (bright light, high ceilings, plenty of room) I feel like it is missing something decor wise. I am on a mission to "jazz it up"... just not sure how yet.


Despite the room needing a bit more oomph. our bedroom is home to the light blue dresser you'll find below....one of my favorite DIY projects of all time.

This thing was REALLY ugly pre-painting (I am kicking myself for not taking a before photo)...super light wood, pastel flowers stenciled across the drawers, and cob-webs throughout...BUT it was free... zero dollars.

It took me 2 days and $10 to transform this piece from "drab to fab". A fabulous Oops paint find in the perfect color ($2.99) + Anthropologie inspired knobs from Marshalls ($7.99)= voila!


Take a look here for a step by step guide on how to refinish a dresser... it really is quite simple (and cheap)!

Next up on the apartment tour... Bedroom #2...stay tuned!

Monday, April 4, 2016

Refurbished and Reused: The Dining Room

Because our first floor has an open floor plan, I paid extra attention to which photos I published in my last blog post... making sure not to "reveal" the dining room prematurely (ridiculous, I know).

It's not that I think that our dining room is anything spectacular, it is actually pretty basic, but the room is filled with DIY projects (tutorials to follow) and truly lives up to this blog’s name... Particularly the kitchen table.

The entire room was put together for less than $50, The table/chairs were free, the shelves are made with scrap wood and L brackets, and the dresser has been in every apartment since the inception of this blog, we just re-purposed it as a buffet. 

Friday, April 1, 2016

Living Room Revealed

I'm acting like you guys are living each day in anticipation of my blog posts. Trust me, I know that's only true for some of you :)

Regardless of what camp you belong to, I am really excited to give you a peek into our apartment...starting with the living room

I tried incredibly hard to make sure that it was our space, not a manifestation of my Pinterest boards 
and feminine decorating tendencies...
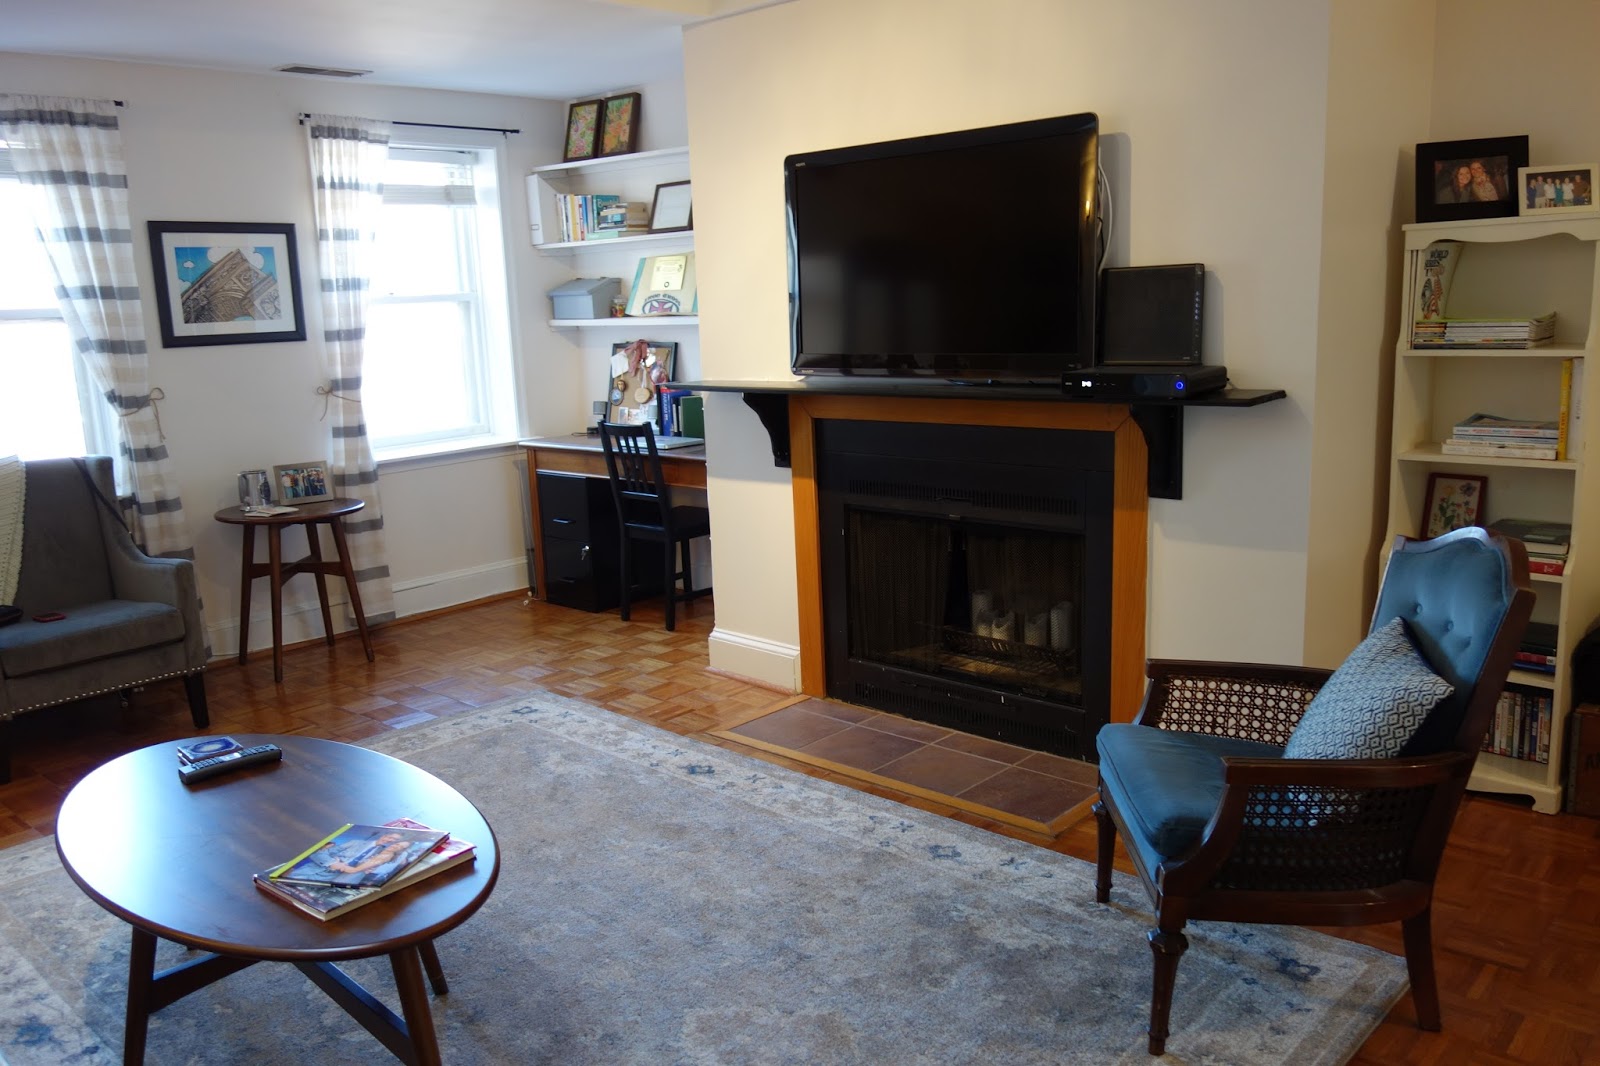
The room is bright and open, everything that my NYC studio was not. I wanted to infuse the space with the character it was lacking and personalize it to our needs/living habits...no white area rugs, no fancy furniture. I wanted it to feel comfortable and lived in.

I made the mantel and the white floating shelves, but overall DIY projects were few and in between when completing this room. I had toyed with trying to reupholster a chair, but then I found the blue gem you're seeing in these photos for $35 at a local antique shop, that idea went out the door. 
We bought the sofa new (coming right in at our $1k budget) and the coffee table was a floor model at pier one that we snagged at a deep discount.

And the rug...oh the rug....we went through 5...yes FIVE different 8x10 rugs before deciding on this one. Buy, drag up 3 flights of stairs, unroll, re-roll, carry down 3 flights of stairs. The 6th and final rug was not returnable and, in part, purchased because of that fact. 

So, while this room was certainly not "paid with pennies" it is my favorite room in the apartment...enjoy!


Monday, March 28, 2016

New Apartment, New Projects, New Posts

After 2 years (plus some) of living in a shoebox on Bleecker Street, barely blogging, and burning through cash like it was Monopoly money-I put a fork in the big apple and relocated to Philadelphia with a very special someone (mush alert).

If you read this blog, even sporadically, you know that I am on an unofficial 2 year moving rotation. Boston to Charlotte to Stamford to NYC to the city of brotherly love… You also know that with each move my blogging picks up— new apartment, new projects, new posts.

Our new apartment, a 2 bedroom/2 bath in the Society Hill area of the city, makes my 300 sq ft studio seem even smaller. And while I think that I made the most of that space, I can’t begin to tell you how awesome it is to have a bedroom door….and a dishwasher, and a patio!

Here is a look at the place before we moved in…


Given the (extremely) historic neighborhood, the interior is strangely modern. But it checked all of our boxes: 2 bedrooms, an outdoor space, not on the ground floor, washer/dryer in unit, etc… and,  given how non-descript the space was, we were able to flex our creative muscles and really personalize each room… Rather than posting photos of the entire place, I am going to write about each room separately— a slow reveal if you will. Stay tuned!

Monday, July 13, 2015

60th Birthday Surprise

When my Mom's 60th birthday rolled around, I knew it was my chance to give her a glimpse (albeit a small one) into how awesome I think she is...

My parent's bought a beach house last year- something they have been dreaming of doing since they met in high school... (cue the "awwws"). They have been renovating for the better part of 6 months, and in this past month, the month of her 60th, it turned the corner from construction zone to (almost done) beautiful home.

My sister and I talked at length about throwing her a surprise birthday party at the beach house - a "new chapter" kind of thing; however, my Mom was adamant about not wanting a party- she made that loud and clear...over and over again.

So, when the day actually rolled around, we wanted to honor her "no party" wish, but be sure that her day/weekend was extra special...I think we were successful.

The week before her birthday I sent the email below to all of her family and friends:

Almost everyone responded within a day or two- It was so much fun reading the responses. I am still laughing at the consistency - it is very obvious that I am not the only person who loves how much fun my mom is- she is a great drinking partner, makes everyone laugh, and is as selfless as they get!

I used Sharpie markers and a roll of white kraft paper to capture everyone's accolades, memories, and the like:


Without her knowing, I headed to the beach late Thursday night in anticipation of her arrival on Friday morning. It took until 2am to complete, but the look on her face when she walked into this:


Was priceless....


A birthday celebration would not be complete without a cake, right?
Given the significance of my parent’s new beach house,  I wanted  my mom’s birthday cake to be “beach-themed". Hours of Pinterest browsing lead to this… 
Ridiculous, right?! It was a 2+ hour challenge and turned out looking more like a cake for a 6 year old than one for a 60 year old.... at least it tasted good!

My DIY creations ended here, but I do want to give a big shout out to a woman named Susan Windsor. My sis and I came across Susan's shop on Etsy.com and knew right away that she would create the perfect, "sentimental gift that's not a surpise party" gift. A few weeks after my mom's birthday, this painting showed up at her door....


Happy Birthday Mom- You deserve the world and more. We love you!


Monday, June 22, 2015

Bridal Showers, Weddings, and Birthdays oh my!

The first half of my 2015 has been filled with "milestone" celebrations... bridal showers, baby showers, weddings, and birthdays have booked my weekends solid. Not only have I been able to spend more time with the people I love most, but I have also had an excuse go on a DIY frenzy...

I have a tendency to bite off more than I can chew when I am presented with DIY opportunities - I find myself saying things like  “of course I will make all of the invitations by hand!” or “ I'll make 50 glass tags – no big deal at all!” – But when push comes to shove, the reason I commit to all of these crazy projects is because I love making my loved ones feel loved (sappy, I know). With that being said, I had to be rather strategic with my decorations for all of these events, both from a budget stand point and a size standpoint- transporting center pieces on a Bolt Bus from NYC to Connecticut was simply not an option.

My next few posts will highlight a few of the things I made for a few of my favorite people in the last 6 months…First up, my cousin Carly's bridal shower that was held at my parent's house.

Invitations: 
Despite what I mentioned above, I opted to order the shower invites from minted.com rather than make them- not only do they offer a gigantic selection, they really let you flex your creative muscles when it comes to designing the final product. 
Carly's wedding inspiration was rustic yet feminine- I wanted to make sure that her shower felt the same way all the way down to the invitations. Below is a snap shot of what all the invitees received in the mail....


Decorations:
I wanted to keep it simple and personal. 
Carly and her new husband, Andy,  have been together for quite some time, and so most of their story can be told through pictures...with 6+ years worth of facebook photos and a very sweet email response from Andy it was easy to come up these gems:


As you can probably tell from the photos above, I wasn't kidding when I said that I committed to making over 50 drink tags...each had a different floral pattern and each  had a different "wedding" word...


And whats a bridal shower without  "days to go" and "bride-to-be" signs ?!


A few more for your viewing pleasure!


Sunday, March 29, 2015

Hemnes Hack- Part One

Things our apartment has: a great location (+), a renovated kitchen(+), a horrible layout(-) , and two people living in 300 sqft (-)...we clearly like each other...(+).

Things our apartment doesn't have: closet space (-) (remedy found here), a couch (-), a place to work/study (-), any extra storage space what-so-ever (-).

So when Mr. Landlord asked if we'd be renewing our lease, our first instinct was a resounding no. However...

Moving is a royal PITA. Not to mention disgustingly expensive. Did we really want to pack everything in our current apartment up only to move a few streets away and into a place that would likely be just a smidgen larger than our current apartment? The answer: a resounding NO! (clearly a "no" with more umph than the one above)

And so, I put my dusty DIY hat on and  whipped out my tape measure. I, my friends, was determined to craft something that would make our space at least a little bit more functional.

Here is a photo of our living area pre-Hemnes Hack. Cute? Sure- but, in reality, the space was looked at more than it was utilized...which when you live in a space as small as ours is a really big waste o' sq ft.

The space is long and narrow making it really difficult to define different areas (office area/living area, etc)- I knew that my solution had to be multi-functional: in my dream world it would offer comfy seating, an area to work and eat, and would provide extra storage- dream on, right? Wrong!

It just so happens that Ikea's Hemnes TV Shelf is 72 inches long- the same length as the area I was working with- it is a mere 18 inches wide and the height of a standard bench....oh, and it has 3 deep drawers along the bottom. Jackpot.

The Ikea in Brooklyn wanted to charge me $229 for the unit + $175 shipping (they are the ones who should dream on), and so, I became obsessed with craigslist and krrb....searching for "hemnes" morning, noon, and night. After may hemnes-less days, the "no-results" message turned into "1 result"...  1 hour and $100 dollars later, she was all mine.

As you can tell from the below, my plan was pretty sophisticated...Color coded and all.
In all honesty, I knew what I wanted the finished product to look like, but really had no idea how to execute it.

It wasn't without numerous expletives, but my vision ended up a reality. Take a look at our new work/dine/store living area below.