Please excuse me if I am too enthusiastic about this post....
I mentioned in the last post about my L&J t-shirt quilt that my sewing skills are at the kindergarten level, so the fact that I went
from this:

to this:

to this:

Has me pretty excited..I think I may have jumped up and down a few times when I finished sewing the last row...it's the little things people.
Okay, okay. I still have a lot of hills (mountains in my case) to climb before I can snuggle up under this thing, but figured I'd write about the very non-professional steps that I took to make the top of my quilt (if you are a skilled quilter you will probably want to pass on reading this post)
Anyway…
After cutting all of the shirts in half and removing the sleeves and collar, I started cutting out my logos using my 6” plastic template and a rotary cutter. The size of the logos varied pretty drastically. If the entire logo fit into my 6” square…great! If not I split up the logo and was able to get more squares out of a logo (see below)


I was able to cut 70 squares with logos, and then started to cut out filler squares (squares made from the plain part of the shirts)…I ended up with 120 squares and carpel tunnel.
** I originally wanted this blanket to be full sized which meant 200+ squares, but after laying out the squares on the ground I realized that full sized was just too big and that there would be more filler squares than logo squares. So, I decided 120 was a good stopping point**
Most t-shirt quilt tutorials recommend ironing fusible interfacing on the back of the squares so that the t-shirts don’t stretch when you sew them together. Unbeknownst to me you are supposed to iron the interfacing onto the shirts before you cut your squares…at this point I had two options:
1) Cut out 120 squares of interfacing and iron 120 squares of interfacing onto each of my tshirt squares
2) Continue sans-interfacing and hope for the best
Guess which option I went with….
I laid my squares out on my floor and re-arranged them until I came up with a pattern I liked. 


I organized them in “row piles” and moved on to the next (very scary) step…sewing.

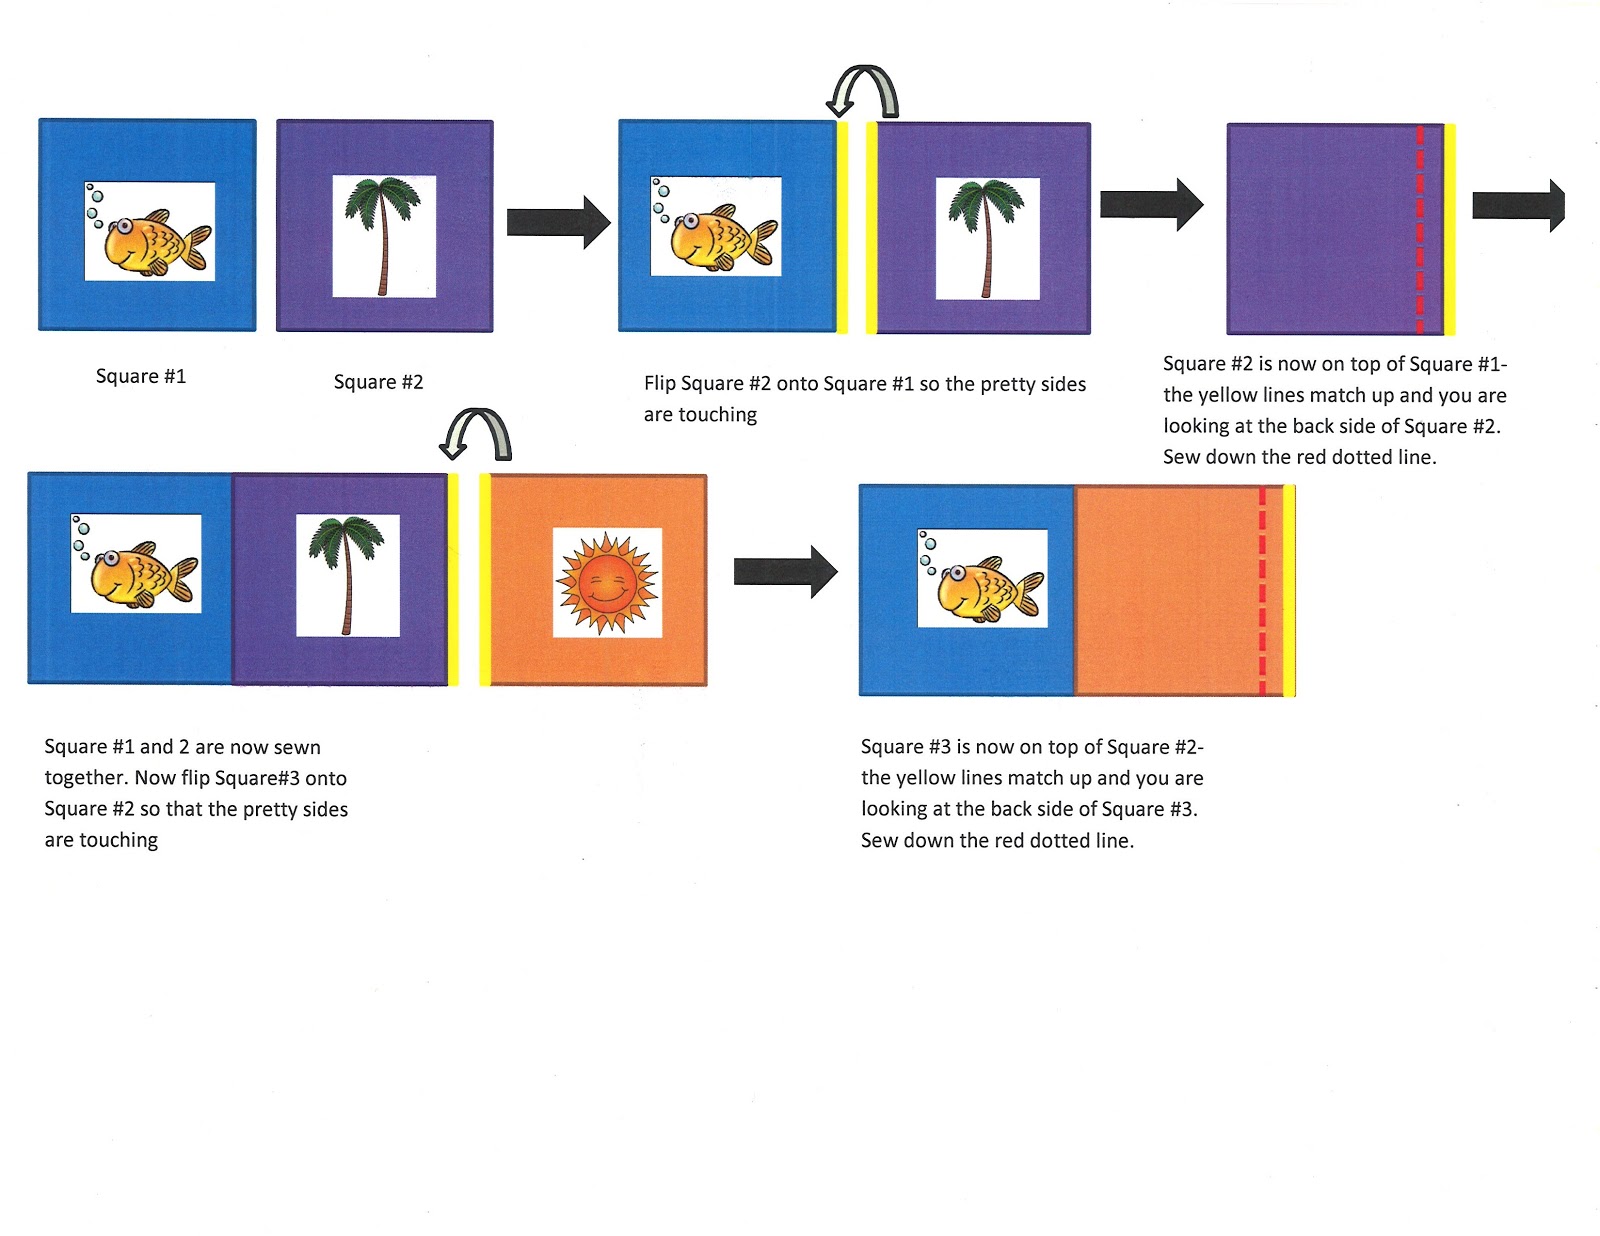
I feel like every tutorial on how to sew a quilt is written in a different language…I simply don’t understand sewing/quilting lingo but, I took bits and pieces of different tutorials and finally figured it out…here is my very dumbed down version of how to sew together the rows of your quilt:
After I sewed two full rows (9 squares across) I sewed them together (using the same concept as above…line up, flip, stitch, unfold). I quickly realized that interfacing would have made for a more professional looking (read: evenly lined up) quilt top…but was happy with the way it looked nonetheless.
I continued the “sew a row, attach a row” until my quilt top was 10 rows long.
Next up- a border, some batting, and some backing.
Stay tuned!
No comments:
Post a Comment