Sewing isn’t exactly my forte….I always have these grand
ambitions when I make the decision to embark on a project that requires a needle
and thread…but as soon as I put the presser foot down, my ambition turns into anxiety.
I would consider patience to be one of my strengths, but for
some reason when I sew I just can’t wait to finish. You are supposed press the
pedal of your sewing machine down gently so that you can control your stitch...
Oh no. I flat out floor it.
I really have never made something that requires sewing
anything other than a straight line. Curtain panels, T-shirt Quilt, and now a
tree skirt. Regardless of my crappy stitching skills, I am actually happy with
the way this thing turned out…It looks a little J.Crewish to me…and in typical
Made with Love Paid with Pennies fashion, it was free (I bought the fabric last year to make stockings...that clearly didn't happen).
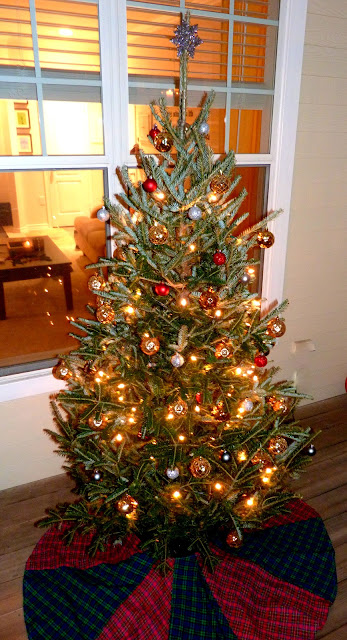
I wanted my tree skirt to be colorful, but not gaudy…fun, but not flashy. I love the look of the ruffle tree skirts that are popping up all over Pinterest, but if I went that route, my tree would be skirtless this season. So, I opted for the quilted look.

I wanted my tree skirt to be colorful, but not gaudy…fun, but not flashy. I love the look of the ruffle tree skirts that are popping up all over Pinterest, but if I went that route, my tree would be skirtless this season. So, I opted for the quilted look.
This tree skirt from "Crafterholic" was my inspiration:
I used an old tree skirt to help me determine the size of my skirt and to make my template.

 |
| http://crafterholic.blogspot.com/2011/12/diy-tree-skirts.html |
I used an old tree skirt to help me determine the size of my skirt and to make my template.


I think I missed a "fold in half again" in these steps, but you get the idea.
...you want to end up with 1/8 of a circle.

After all of your pieces of the pie are cut out, iron one triangle perfectly in half. You should have a perfect point at the bottom...cut off any excess.

 |
| a close up view of the excess material you will need to cut off |

Now, arrange all of your triangles on the floor so you can have a preview of what your final product will look like...

The steps I took to make my tree skirt were very similar to the steps I took to make my Lenny & Joe’s T-shirt quilt....Just replace the word square with triangle in the steps below.

Use a bowl to trace the a circle in the middle of your skirt- cut along the line (this is the opening for the tree stand). Fold the edges under and sew so that there are no raw edges.
Last but not least, finish the perimeter of your skirt by folding each triangle down so that they are all at the same height.

Pin, Iron, Sew. Voila!

.jpg)
No comments:
Post a Comment