Monday, January 7, 2013

Bedroom Re-Design for JMac

Goodness gracious I am exhausted. So tired that typing this is a bit taxing...but, I am super excited about this post, so I will push through :) 

I have spent the last 48 hours playing designer for a co-worker who is out of town on business. A few months ago, he asked me to build him a headboard (I love the fact that guys enjoy reading this blog just as much as girls!) and somehow that request morphed into a full blown bedroom re-design...and he is going to be surprised! He gave me no direction as to what he wanted his room to look like... he simply handed me his keys, a $700 check, and was off...

This was our conversation before he left for his trip...I had never seen his place, so I wanted to stop by and assess what I was working with....


This is what I found.

Yes, it's true. There is no frame under that bed and the TV is on something (still not sure what that something is) that is covered with a black sheet. Needless to say, I had my work cut out for me...hence my exhaustion mentioned above.

Without any input from JMac, I wanted to make sure the room I put together wasn't too much of one thing...not too modern, not too rustic, not to bold, not too plain. My goal was to design a room that appealed to all different tastes so that I didn't run in a direction that JMac wasn't fond of.

I used a clue from the shower curtain in his guest bath to come up with my color pallet-teal, black, grey, and tan. Luckily for me, these colors seem to be quite popular this season.

I did all of my shopping on Saturday, and all of the labor on Sunday. 

My Shopping List:
Bed Frame
Bedding
Curtain Rod and Curtains
Media Stand for TV
Picture Frames/Accessories
Material, Wood, & Mattress Pad for DIY headboard
New Nightstand (or materials to DIY one)
Hardware

In typical Made With Love, Paid with Pennies fashion- I was determined to find the best deals possible. Just because JMac gave me a $700 budget, didn't mean I had to spend every last bit of it.

This bed skirt was in the clearance section at Homegoods, and exactly what I was looking for! 

I also found two ottomans at Target for $17 each (in the 70% off clearance section)!! I wasn't sure what I was going to do with them until I was all finished with the room, but they are the perfect colors and tie everything together ( you can see them in the "after" photos below)

I DIYed a nightstand for less than $13 using a piece of wood from the As-Is section at (my favorite store) Home Depot, some black paint, and two corbels. (the photo below is obviously pre-paint and installation)

I even bargained with a mattress store associate for a bed frame. He wanted to charge me $85, I said "$60", and he said "okay"

I made all of the art in the room using Google and Microsoft Word.
JMac is a big UNC fan, so I made him this photo for one of his nightstands:
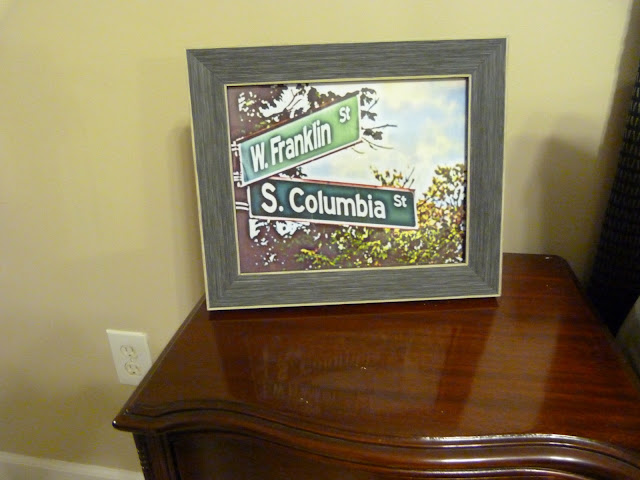
And just like what I did in my "Thirsty Thursday" post, I covered two standard white mats with fabric and framed the skyline of Atlanta (where he grew up) and of Charlotte (where he lives now).


Last, but most definitely not least, I successfully completed DIY Headboard #3.


To see how I finish and hang a DIY headboard, check out my first headboard post here.

All this, plus some, and here is what JMac will be coming home to:


From this...
To this...


I cannot wait to see/hear JMac's reaction! fingers crossed he likes everything! (PS...I was $125 under budget!)


**Update** 
I think he likes it!


Monday, December 31, 2012

Make a wish

So, I had a random piece of plywood lying around.

 Bizarre, right? Ya, I know. Extra bizzare because this is not the first time I have started a post writing about a random piece of wood hanging around my apartment.

Anyway, when I had the wood cut to make my second DIY headboard, I naturally kept the scrap piece (a very large scrap). Unsure of what I was going to use it for, I kept it in the trunk of my car for a full two weeks. When I finally got the motivation to carry it up three flights of stairs, I did just that...and then leaned it up against a wall in my living room...until today. 

I woke up with a bee in my bonnet, and if you know me at all you know that when there is a bee in this girl's bonnet, she buzzes around like a mad woman. 

To set the stage, It is 7am (on a Sunday morning mind you) and there I am staining said piece of scrap wood in my PJs, eyes half open, and a cup of coffee in hand.


Once the wood was stained, I was really unsure of where I was going to go from there. So, I walked away from it and cleaned my closet.

Closet Before-EEK!


Closet After-Ahhh


Check out all of the clothes I donated to Good Will....Who knew I was a closet hoarder (pun intended)...

Anyway, back to my newly stained piece of wood. 

I decided that whatever the final product was, it was going to go above the longer/shorter dresser in my bedroom. I have wanted something to fill that space since I moved in last February, so it is obvious that I haven't come across anything that I think is bedroom wall worthy.

My ideas about what to paint on this wood were pretty scarce...I was thinking about painting a favorite quote, but that would be too similar to my DIY wood piece above my couch. I knew I didn't want anything too cutesy, and I was pretty set on not painting anything abstract. It wasn't until last night when I heard someone on TV say the word "wish" that I came up with the idea of painting (drawing) this...


I definitely want to add some color to my dresser...I am thinking about buying a big fun lamp with a colorful base, maybe a pretty tray for my perfume, and who knows what else...I will keep you posted!

Happy New Year everyone!! Wishing you a healthy, happy 2013!


Thursday, December 27, 2012

Taking on a Bachelor Pad

My friend Eric just built a house... a big, beautiful house with 4 bedrooms, a chef's kitchen, hardwood floors, crown molding...you name it, this house has got it....and, he moves in today!

Eric, this post is dedicated to you! Congrats!!

Eric's house is my first big decorating project. I am so happy he has put his faith in me and is letting me run with my different ideas on how to outfit his new bachelor pad.

Mood boards will be the tie that binds us over the next few months...I will create them, Eric will critique them, and when he is happy with the way the room looks on a piece of paper, we will make it a reality.

The kitchen and living room flow really nicely together, so I want to make the two rooms "mesh" well. The back splash in the kitchen has hints of turquoise, so I used this pallet from design-seeds.com to design the living room.
http://design-seeds.com/index.php/home/entry/crescent-color


I am certain the final living room will look nothing like this mood board, but as we work together they will help me figure out what kind of things Eric loves and what he could do without.

Stay tuned- it is a big house with lots of decorating to be done!!


Monday, December 24, 2012

Holiday Hooch

I have been a bad blogger lately. I am really sorry about this, but I must be honest...
with all of the holiday parties, travel, and shopping- DIY projects aren't exactly at the forefront of my mind... so, I really don't have much to post about.

The purpose of this post is more to let you know that I am still around and that I haven't forgot about you than it is a "How-To" or "1-day project" post...I am asking for your forgiveness on this one in advance :)

Anyway, in the midst of the traveling, shopping and partying, I did make time to blend up some homemade Bailey's for my friends and co-workers.


I have more Bailey's to make, but I ran out of Whisky before heading home for Christmas. So, if you are reading this and wondering why I didn't make some for you, I promise there is some coming your way!!

The labels are from onlinelabels.com. I used the Weatherproof Polyester Laser labels (Product: OL6200LP).

I simply downloaded the blank template from the onlinelabels.com website and played around with colors/design until I came up with 4 labels that I was happy with.

I bought the jars at WalMart. They are the generic brand canning jars. 12 jars, lids, and bands cost me $7.99. I would have preferred to use Ball Jars, but the WalMart brand jars have a smooth surface which makes applying a label much easier.

To make up for my bad blogger behavior, I thought I would share a bailey's recipe with you all...

Homemade Baileys:

  • 1 cup half and half (go for full fat half &half...this is not time skimp on flavor!)
  • 1 (14 oz) can sweetened condensed milk (I prefer Eagle brand)
  • 1-2/3 cup whiskey (I use Jameson)
  • 1 teaspoon instant coffee
  • 2 tablespoons chocolate syrup (Hershey's of course!)
  • 1 teaspoon vanilla extract
  • 1 teaspoon almond extract

  • Put all of the ingredients in a blender and blend at the highest speed for 30 seconds. Store in a tightly sealed container (canning jars or old liquor bottles work great). Serve with coffee, hot chocolate, or straight up!

    Note: This is not the recipe for Fahey's Baileys...that is top secret!

    Merry Christmas Eve!!!

    xoxo

    Thursday, December 13, 2012

    Christmas Corks

    It is unseasonably warm here in Charlotte. Wearing short sleeve shirts sans jackets kind of unseasonable.

    Trust me, I am not complaining about springtime weather in mid-December, but it is kind of tough to get into the Christmas spirit when it is 65 degrees outside (even though I decked my halls...or porch).

    So, to add a little holiday pep to my step, I headed to the store that cures all ....Home Depot.

    This project technically took me years to complete, but it only cost me $0.68. I know, I'm annoying :)

    If you know me at all, you know I love a good glass of wine (or 2). This evidenced by my lovely wine cork collection.


     *** this collection is the result of many years of hard work, a 6 week trip to Italy, and contributions from my friends and family :) ***

    Anyway, when you love wine like I do, and you decide to collect corks, you end up with a plethora of corks and really nothing to do with them, so you come up with random ideas like this one.


    All you need to make this cute little vertical card holder is a yard stick from Home Depot (really you could get one from anywhere, but why would you deviate from the best) , a hot glue gun, a picture hook, a screw, and of course wine corks.

     I bet you can figure this one out without a step by step tutorial. Enjoy!
    $0.68


    And for good measure...


    Thursday, December 6, 2012

    J.Crewish Tree-Skirt


    Sewing isn’t exactly my forte….I always have these grand ambitions when I make the decision to embark on a project that requires a needle and thread…but as soon as I put the presser foot down, my ambition turns into anxiety.

    I would consider patience to be one of my strengths, but for some reason when I sew I just can’t wait to finish. You are supposed press the pedal of your sewing machine down gently so that you can control your stitch... Oh no. I flat out floor it.

    I really have never made something that requires sewing anything other than a straight line. Curtain panels, T-shirt Quilt, and now a tree skirt. Regardless of my crappy stitching skills, I am actually happy with the way this thing turned out…It looks a little J.Crewish to me…and in typical Made with Love Paid with Pennies fashion, it was free (I bought the fabric last year to make stockings...that clearly didn't happen).


    I wanted my tree skirt to be colorful, but not gaudy…fun, but not flashy. I love the look of the ruffle tree skirts that are popping up all over Pinterest, but if I went that route, my tree would be skirtless this season. So, I opted for the quilted look.

    This tree skirt from "Crafterholic" was my inspiration:
    http://crafterholic.blogspot.com/2011/12/diy-tree-skirts.html

    I used an old tree skirt to help me determine the size of my skirt and to make my template.


    I think I missed a "fold in half again" in these steps, but you get the idea.
    ...you want to end up with 1/8 of a circle.


    After all of your pieces of the pie are cut out, iron one triangle perfectly in half. You should have a perfect point at the bottom...cut off any excess.
    a close up view of the excess material you will need to cut off


    Now, arrange all of your triangles on the floor so you can have a preview of what your final product will look like...


    The steps I took to make my tree skirt were very similar to the steps I took to make my Lenny & Joe’s T-shirt quilt....Just replace the word square with triangle in the steps below.
    Once all of your triangles are sewn together, create ties with the scraps. Simply cut out strips of fabric, finish the ends and sew to your inner most triangles. This step isn't necessary, but I think it adds a cute touch.

    Use a bowl to trace the a circle in the middle of your skirt- cut along the line (this is the opening for the tree stand). Fold the edges under and sew so that there are no raw edges.

    Last but not least, finish the perimeter of your skirt by folding each triangle down so that they are all at the same height.

     Pin, Iron, Sew. Voila!